Menu
Set up your P2COS prospecting workspace.
Windows installation is available through Microsoft Store or the website EXE. Mac DMGs are available for Apple Silicon and Intel on macOS 13 or later. Mac builds are not Apple Developer ID signed or notarized; runtime testing is ongoing and automatic launch at login is Windows-only. Choose your installer and read the release notes →
Install P2COS for Windows through Microsoft Store. Publisher: Zm.Visuals876. A valid P2COS license or eligible website entitlement is required to use the software.
Get P2COS from Microsoft StoreA practical guide to installation, your first prospect search, contact research, outreach and backups. Start with a small search you can inspect, then expand your workflow.
Updated 12 October 2026 · For P2COS 0.6 Early Access. Check release status for current availability.
From your account to a working workspace
- Verify your P2COS account.
Sign in with the account associated with your purchase and complete email verification. The account dashboard shows your access. An eligible entitlement is required for protected desktop downloads.
- Download the installer for your computer.
Use the P2COS download page. Keep the installer version in mind when comparing your screens with this guide. For Windows, the website EXE is unsigned and may display an Unknown publisher or SmartScreen prompt. For Mac, choose arm64 for Apple Silicon or x64 for Intel; macOS 13 or later is required. The Mac DMGs are not Apple Developer ID signed or notarized and macOS may block opening them. If you cannot verify the download came from P2COS, stop and contact support.
- Install and activate.
Windows: follow the EXE installer. Mac: open the DMG, drag P2COS into Applications and launch it from Applications. Then use the activation method shown in the software for your purchase or website access. Do not share your license key or desktop connection token. If activation reports a device limit, resolve your existing connections through your account or support.
- Open the walkthrough.
The software includes a 13-step walkthrough. You can replay it from Help center to revisit the main workspaces after your first setup.
Make the target specific enough to research
- Save your business context.
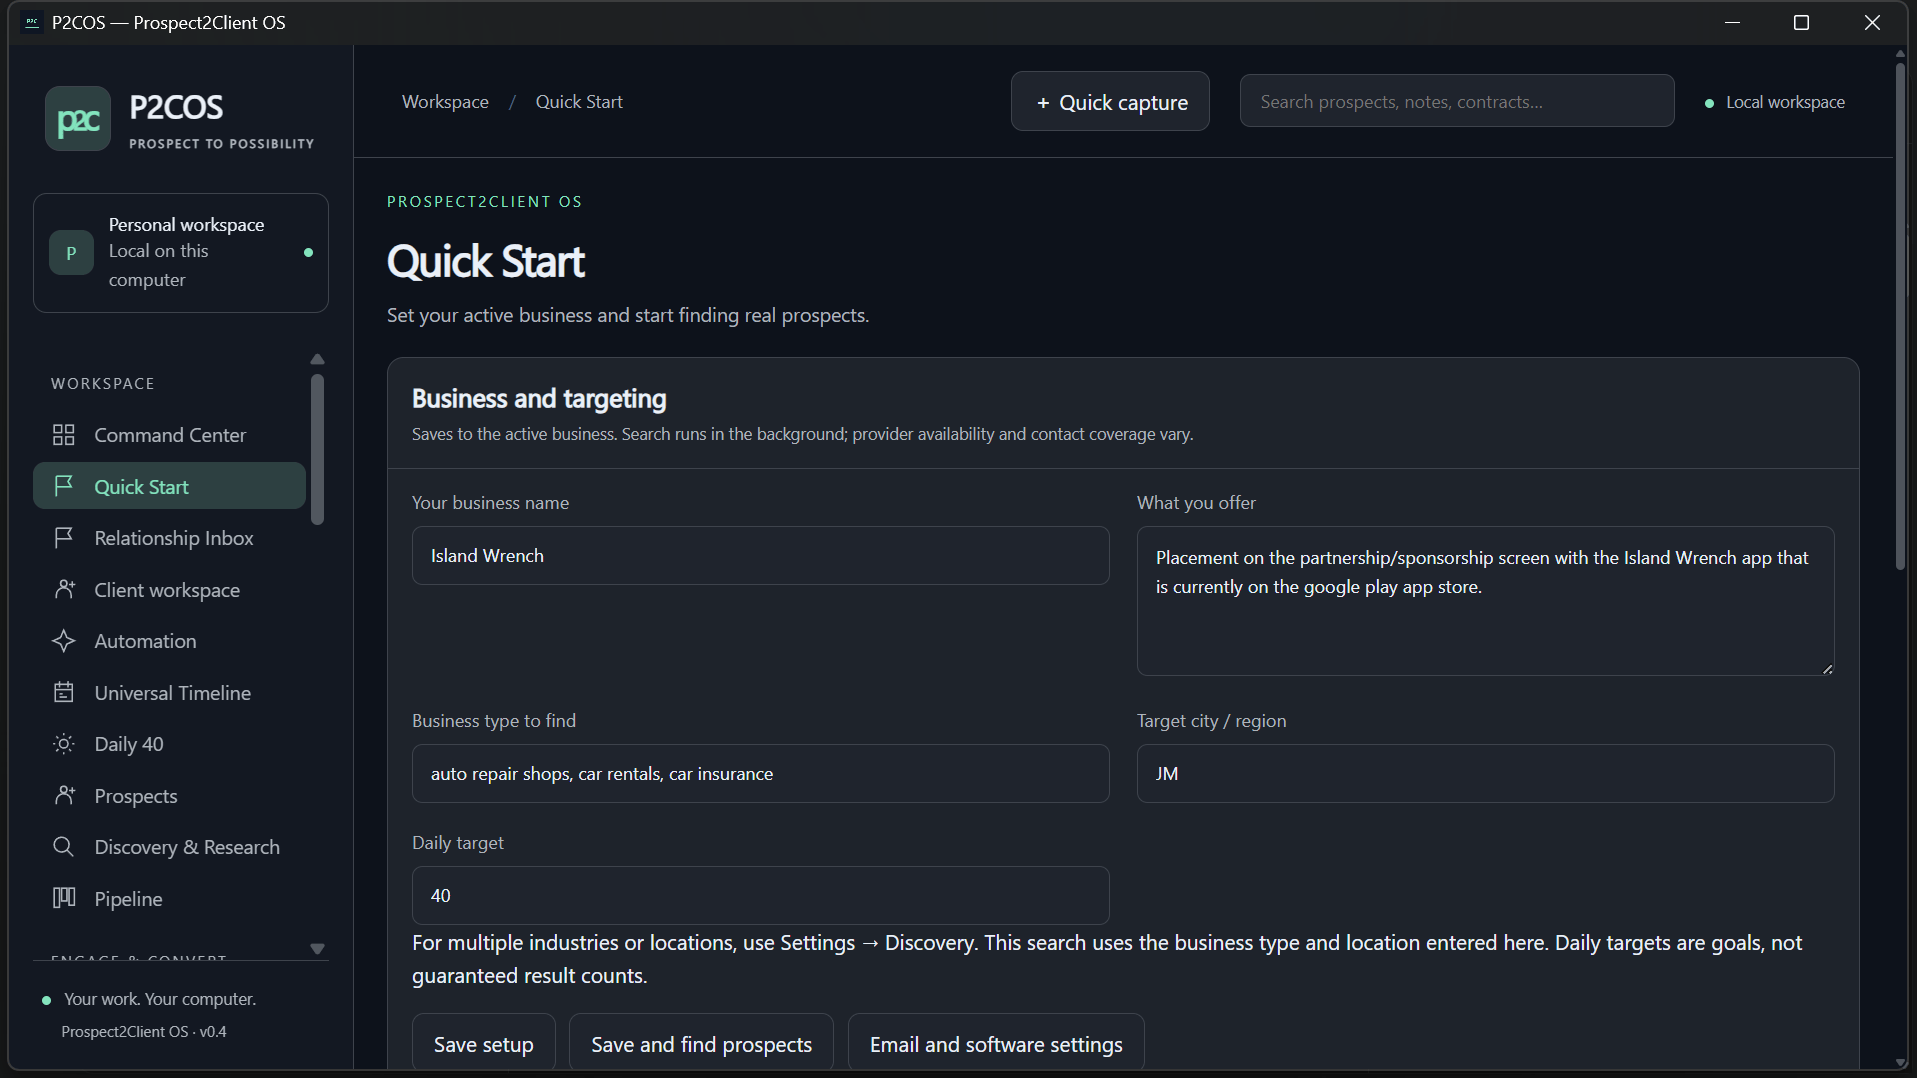
In Settings → Business & Goals, enter your service, target business type, location and goals. A clear offer helps you judge whether a discovered business is relevant.
- Choose discovery sources.
In Settings → Discovery, select Web, OpenStreetMap, or both. Map searches use a two-letter country code. Start with one business type and one city before widening the search.
- Run Find prospects.
Open Discovery & Research and start a search. Results and progress appear inside P2COS; the research browser is available when you want to inspect a source. Public providers can return incomplete results or rate limits, so the requested target is not a guaranteed result count.
- Use your daily queue.
The daily queue brings researched prospects into a working list. Set the target to suit your capacity rather than treating a sample screen’s number as a fixed limit. Scheduled work requires P2COS to remain running.
A worked targeting example
Suppose you offer website photography to independent restaurants in Kingston. Begin with restaurants in that city. For each candidate, check the business’s own website for its location, services and public contact route. A restaurant name in a result does not establish that it needs photography or has agreed to receive a proposal. This is an illustrative workflow, not a customer result.
Turn a candidate into a useful record
Open the prospect and inspect its source links before relying on the saved details. Check the company name, website domain, location and the relevance of the contact. An email address copied from a directory may be outdated or belong to a different branch.
- Prefer contact details published by the business itself and retain the source.
- Record missing information as missing. Do not turn a guessed email pattern into a verified contact.
- Review fit against your own offer. A fit score prioritizes research; it is not a probability of closing a sale.
- Keep corrections and notes on the existing relationship record so future drafts use the same context.
If two results describe the same business, inspect the website and identity before adding another record. Research quality is more useful than inflating the size of the list.
Keep the message connected to the research
Prepare outreach from the saved prospect and your business context. Before sending, check the recipient, factual claims, service offered and next step. Avoid implying a relationship or a need that your source does not support.
Google connection controls are in Settings → Google & Gmail. Complete the connection shown there and inspect its status. Gmail integration is designed around saved prospect and contact addresses; it is not a replacement for your entire mailbox.
Review automation settings, sending limits and any required approvals before enabling a workflow. A queued draft is not evidence that a message was delivered. Check the recorded outcome and resolve a held or failed action before retrying. Provider quotas and authentication can pause work.
Use the pipeline to record progress and the calendar for follow-up dates. When a conversation becomes commercial work, keep proposals, contracts and invoice records linked to that relationship. Recording a payment in P2COS is separate from collecting money through your chosen payment provider.
Connect an installed Ollama model
Install Ollama separately from its official download, then install a model suited to your computer. In Settings → Local AI, check the connection, view installed models and select one. No model is bundled with P2COS.
Use local assistance to summarize saved context and prepare draft text. Check the output against your source evidence: a model can produce confident but incorrect details. A connected model does not grant it unrestricted web access or prove that a contact is valid. Core discovery and recordkeeping do not require a model.

Import carefully and back up before an update
For CSV migration, map columns and inspect the preview before committing an import. Check a small representative sample first, including contact details and duplicate handling. Keep your original export until you have checked the imported records.
Use Settings to make a full backup before updating or moving computers. A JSON export alone is not a full backup of the database and attachments. Settings shows the data location. Close P2COS before restoring and reconnect Google where required; Computer-protected credentials are not portable account sign-ins.
Settings → Updates checks for releases supplied by the P2COS website. Download and install the offered update yourself. Read the release notes and keep your backup until the updated software opens your records correctly. See local-first and privacy for the boundaries between local records and connected services.
When a step does not complete
No prospects returned
Check the business type, location and selected source. Try a narrower, common category. Read the reported provider status; respect a rate-limit pause instead of repeatedly starting the same search.
Gmail connection or sending paused
Inspect the connection and the action’s recorded error. Reconnect if authorization expired. For quota errors, allow recovery before retrying; repeatedly pressing Send can make diagnosis harder.
Local AI unavailable
Confirm Ollama is running and the selected model is installed. Choose an appropriate model for available memory. Continue core discovery while resolving the model connection.
For help, include your P2COS version, operating system version, the affected screen, exact error text and the steps that led to it. Remove customer data and credentials from screenshots. Do not send passwords, OAuth files or license keys in a public message.
Use the account associated with your access
Purchases and approved access codes attach entitlement to a verified P2COS account. If you received a creator, reviewer, promotional or trial code, use Redeem access, then check your account dashboard. A free website account alone does not establish a paid software entitlement.
For installation, account or workflow questions, visit Support or email support@p2cos.com. For purchase terms, read Terms and the refund policy.